

I. Introduction:
Are you tired of dealing with messy and disorganized code in your team projects? Look no further, because, in this tutorial, I will cover the basics of setting up a GitHub repository, inviting team members, setting permissions and access levels, and using basic Git commands to collaborate on code and track changes and collaboration on GitHub.
Whether you're a seasoned developer or just getting started, this tutorial will provide you with a solid understanding of how to effectively collaborate on code using one of the most popular version control systems - GitHub. I am excited to share my knowledge and experience with you in this blog post, as it's my first one. Let's dive in!
II. Setting Up a GitHub Repository:
A. Creating a new repository:
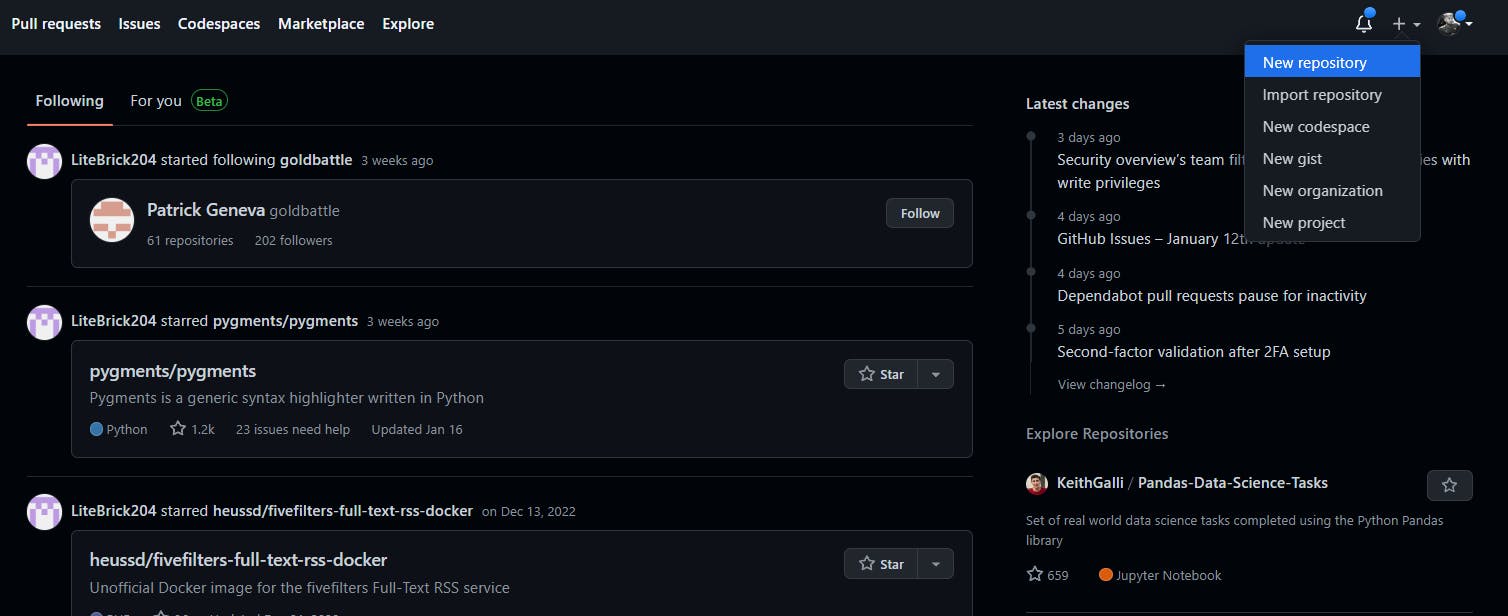
To create a new repository on GitHub, you will need to log in to your GitHub account and navigate to the "Repositories" tab. From there, you can click the "New" button to create a new repository.
You will be prompted to enter a name for your repository, as well as a brief description. You can also choose to make the repository public or private, and initialize it with a README file or other files if desired.
B. Inviting team members to the repository:
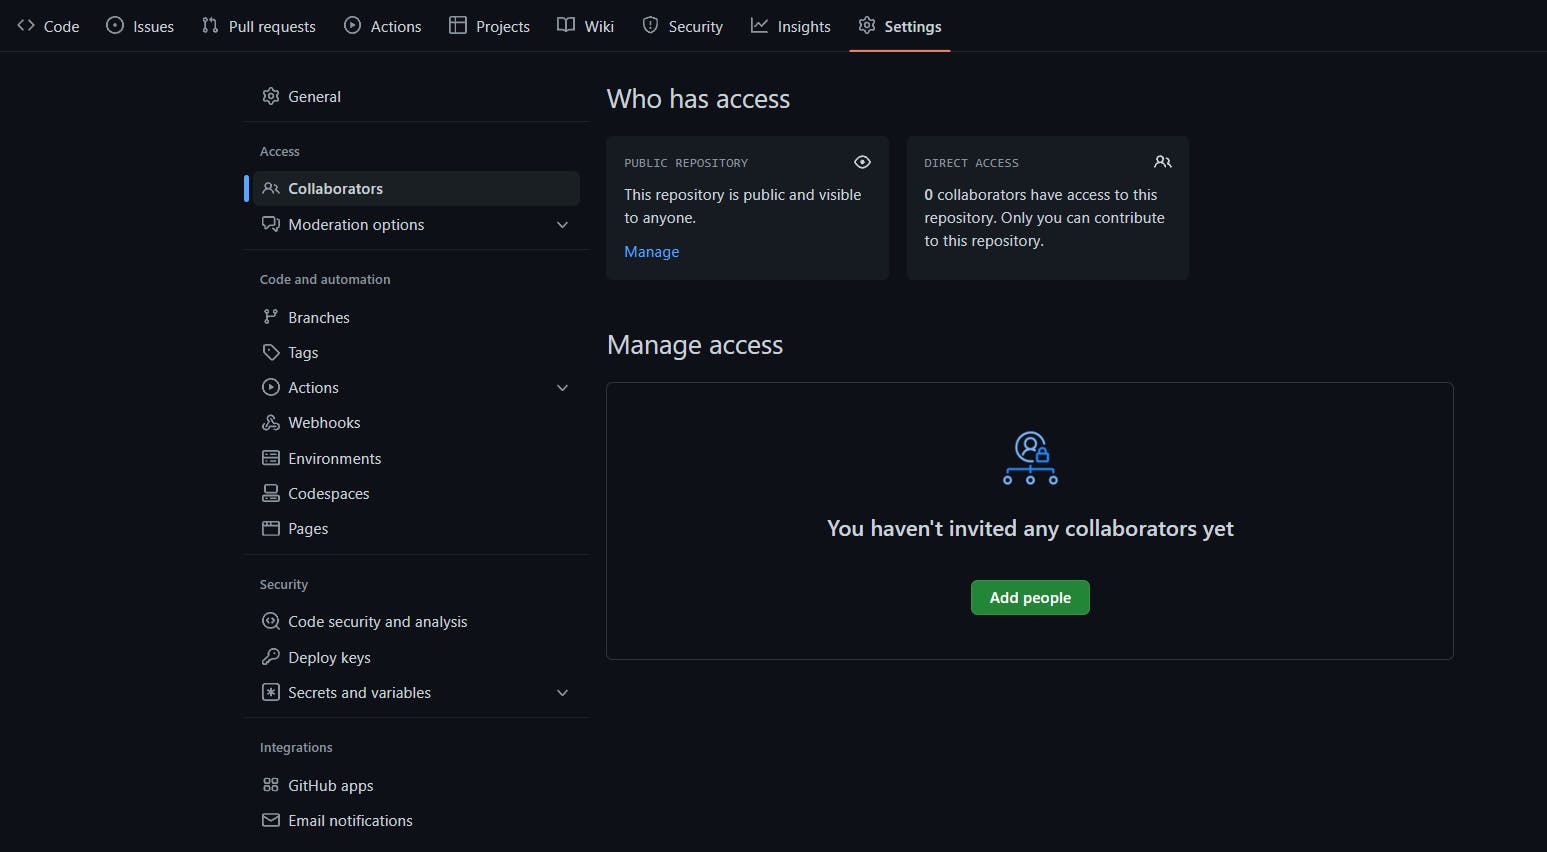
Once you have created your repository, you can invite other team members to collaborate on it. To do this, navigate to the "Settings" tab of your repository, and then select the "Collaborators" option.
Here, you can enter the usernames of the team members you want to invite, and select their level of access (read, write, or admin). Once you have invited your team members, they will receive an email notification with instructions on how to access the repository
.
C. Setting permissions and access levels for team members:
Setting permissions and access levels for team members on a GitHub repository allows you to control who can make changes to the code and who can view the code.
This can be done by setting different roles for team members, such as "owner," "collaborator," or "read-only".
The owner has the highest level of access and can make any changes to the repository, while collaborators can make changes but cannot delete the repository.
This allows teams to maintain control over the code and protect against unwanted changes while still allowing multiple people to contribute and collaborate.
III. Basic Git Commands:
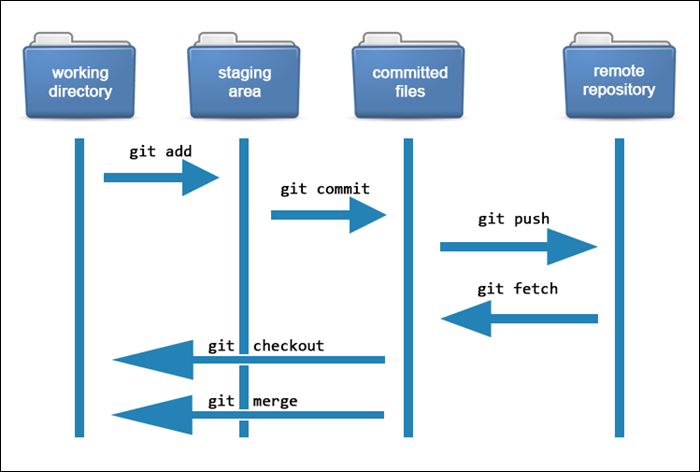
A. Understanding the Git workflow:
Git is a distributed version control system, each team member has a complete copy of the repository on their machine, allowing independent work without internet connection.
Git workflow involves creating branches for features/bug fixes and merging them into the main branch, keeping it stable and free from conflicts, and allowing parallel work on new features/bug fixes.
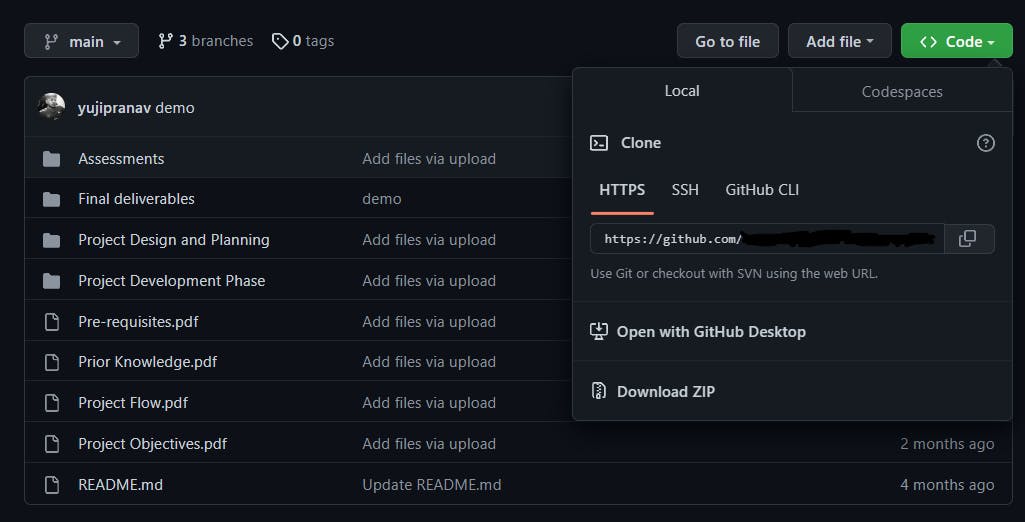
B. Cloning a repository:
To start working on a project that is hosted on GitHub, you will first need to clone -the repository to your local machine.
This creates a copy of the entire repository on your machine, including all files and commit history.
To clone a repository, you will need to use the command "git clone" followed by the URL of the repository
C. Making changes and committing them:
After you've cloned a repository, you can start making changes to the code. Once you've made a set of changes, you'll want to commit them to the repository.
"git commit" creates a snapshot of the code, including a message describing the changes made. Use the command with a commit message in quotes.
D. Pushing and pulling changes to and from the repository:
Pushing and pulling changes are actions that synchronize your local repository with the remote repository on GitHub.
Pushing changes uploads local commits to the remote repository, allowing other team members to see and access them.
Pulling changes downloads new commits from the remote repository to the local repository, keeping it updated with the latest changes.
Both commands, "git push" and "git pull", are essential for collaboration on a project hosted on GitHub.
IV. Collaboration on GitHub:
A. Creating branches for different features or bug fixes:
GitHub allows for the creation of branches, and separate copies of the codebase, enabling multiple team members to work on different features or bugs simultaneously without affecting the main branch.
GitHub allows efficient and organized collaboration by creating branches for features/bug fixes and merging them back into the main branch. Use "git branch" followed by the branch name to create a new branch.
B. Merging branches and resolving conflicts:
Once a feature or bug fix is complete, it can be merged back into the main branch. This process is known as "merging" and it can be done using the command "git merge".
When merging branches, conflicts may occur when multiple team members have made changes to the same lines of code. The team must resolve these conflicts before merging the branches.
Git provides tools to help with this process, such as "git diff" to compare changes and "git mergetool" to resolve conflicts.
C. Using pull requests for code review and collaboration:
In addition to merging branches, GitHub provides pull requests as a code review and collaboration feature before merging a branch into the main branch. This feature helps ensure the changes made are correct and does not introduce any bugs.
Team members can leave comments on the pull request, and the person who created the request can make changes based on the feedback before merging.
D. Managing and closing issues:
Managing and closing issues on GitHub refers to tracking and resolving problems or bugs during the development of a project.
Issues are a built-in feature that allows team members to report problems, request features, and discuss ideas.
Managing issues involves reviewing, prioritizing, and assigning them to team members.
Closing an issue marks it as resolved or completed, helping the team stay on track and ensuring all problems are addressed and resolved.
V. CONCLUSION:
In conclusion, this guide has covered the basics of using GitHub in a team setting, including setting up a repository, inviting team members, setting permissions, and using Git commands for collaboration.
I also highlighted the importance of version control in team settings and the role of GitHub as a platform for managing and collaborating on code projects.
To learn more, I suggest visiting GitHub's official website and online tutorials for comprehensive documentation, tips, and best practices.
GitHub version info: git version 2.37.3.windows.1
YouTube tutorial: https://youtu.be/apGV9Kg7ics
REFERENCES:
https://docs.github.com/en/get-started/quickstart/git-and-github-learning-resources